Theoretically, a cobblestone path should be a simple matter of finding a decent texture, tiling it over the entire map and applying a layer mask. However, I never found a decent cobblestone path texture, so I created my own using layer styles and filters.
If you find a texture that you like yourself, go ahead and mask it just like with the grass layer. However, if not, or if you just like messing around with Photoshop, read on.
6.1 Cobblestone Pattern
This is a fairly straightforward application of filters, with just a couple of points worth noting. Firstly, where we would usually create a new layer on our map and start work, our map is CMYK to make for better printing and one of the filters we need only works on RGB images.
So, the first step is to create an RGB image the same size as your main map.

Once done, follow these steps...
- Fill the image with a mid-grey.
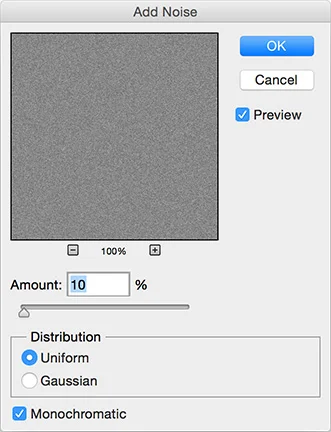
- Go to the "Filter" menu and then "Add Noise". Use the following settings.
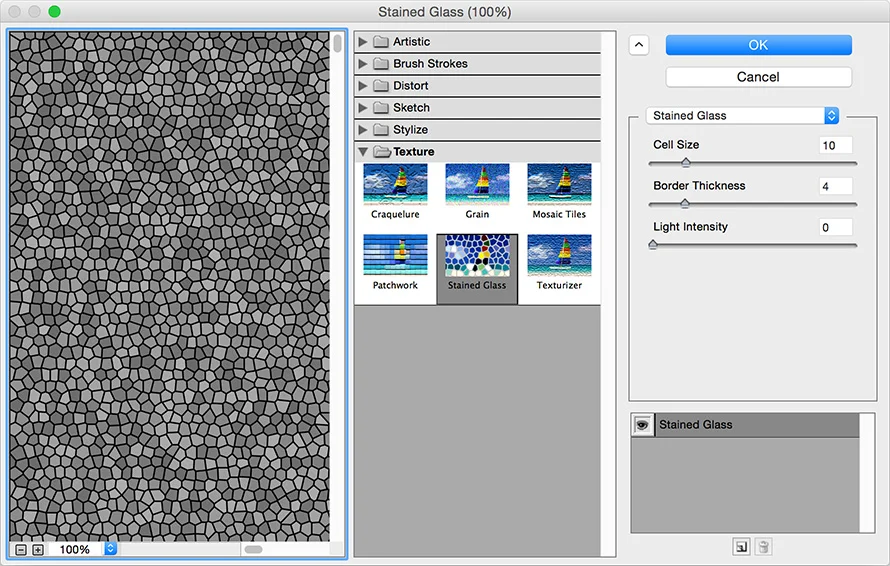
- Make sure your foreground colour is black (I'll explain why in a moment) and go to the "Filter" menu, select "Filter Gallery" and then pick "Stained Glass". Use the following settings.
Okay, some explanation.
We added the noise so that Stained Glass had some pixel information to work with. Otherwise, it would do a bunch of complex calculations with no visible result - we'd still have the flat grey. Stained Glass also uses the foreground colour to fill the gaps within the cells and black is a clear, distinct colour that we can easily remove.
Speaking of which...
6.2 Mortar
Follow these steps. It's pretty straightforward.
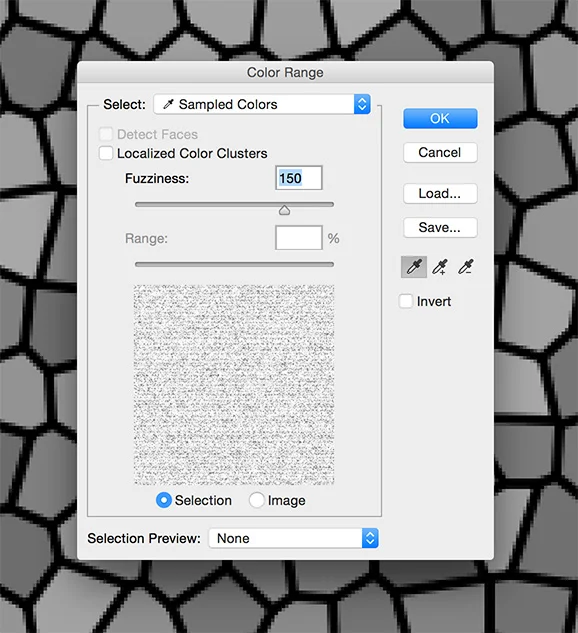
- Go to the "Select" menu, choose "Colour Range" and then select one of the mid-range grey cobblestones. Change the "Fuzziness" to 150, as below.
- Copy your selection and then paste to drop the cobblestones on a new layer.
- Turn off the old cobblestones layer so you can no longer see it. Or just trash it, if you want.
- Create a new layer underneath the visible cobblestones.
- Fill it with a dark grey to act as mortar.
It's very important the cobblestones and the mortar be on separate layers so we can apply some layer effects to make the cobblestones look a little more three dimensional. That's next.
6.3 Depth
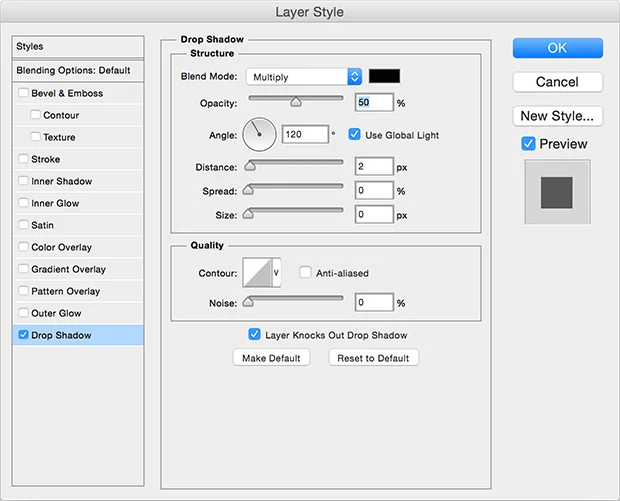
Nothing too complex here but some of the effects are subtle. We need to add a slight drop shadow to the cobblestones, a hint of brown to their colour and a bevel to make them seem rounded. These are all done using Layer Styles.
First the drop shadow...
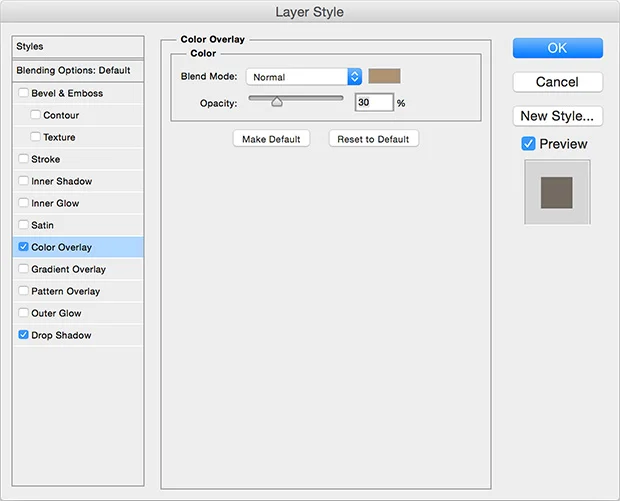
And the tint. The opacity of the tint depends on your preference and the brown colour you choose. You should fiddle around with it until you're happy but I like a mostly grey cobble with just a hint of brown.
And the bevel...

The net result should look something like this.
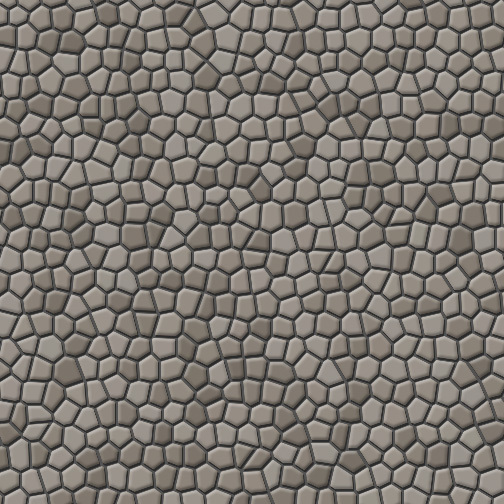
Suitably cobbley.
6.4 Transplant
We can simply move the two layers from the image we are working on to the map but there are a lot of layer styles active here and they all require processing power to maintain. If you have a ridiculously powerful computer, you might not care much, but for most people it's worth trimming down the amount of unnecessary processing Photoshop has to do.
The easier way, then, is to select the whole canvass, go to the "Edit" menu and select "Copy Merged". If you don't know this command, it copies all the pixels which are visible - no matter what layer they're on, no matter if they are created by layer styles... whatever. It just grabs the raw pixels. Then, when you paste it into your map, there are no layer effects running.
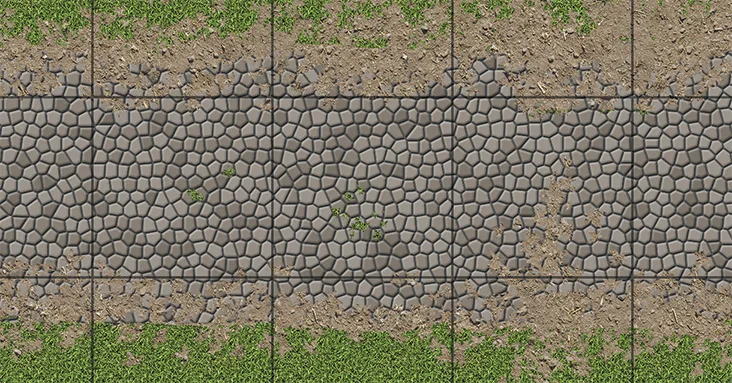
Once you've inserted your cobblestones (above the grass but below the trees somewhere), you can proceed with our usual masking trick so we can "draw" paths with a brush.
6.5 Drawing Paths
Drawing a cobblestone path is very similar to drawing water. You need a large, hard edged brush to draw wide lines and then you clear the edges of grass with a maple leaf brush. You can also make the edges of the path look tatty the same way, so that it appears dirt has been kicked over the sides of the path.
Finally, you can put small amounts of grass on the path itself with a small maple leaf brush, where it will look like moss or grass which has broken through the road.