4.1 Foliage
Grassy plains are all well and good, but we need some cover. Our next order of business is some trees. As with the water layer, we will be using a combination of a layer mask and layer styles, and we need to start with a texture that makes for nice looking trees. We can certainly go online and find one but I had more luck constructing my own out of filters.
- Create a new layer and call it "Trees".
- Fill the entire layer with green. Nothing too bright, although we can adjust it later if need be. I used #44550F.
- Go to the "Filter" menu, select "Noise" and then "Add noise".
- You need uniform, monochromatic noise and the amount should be 10%. See below.

- Go back to the "Filter" menu, select "Pixelate" and then "Crystallize".
- Pick a cell size of 10 and click "OK".

The result doesn't look very leafy but we don't need it too. We just need a broken collection of green shades to give the right impression. The shape and depth of the tree will do the rest, and for that we need layer styles.
4.2 A Quick Tree
First, as we did with the water, we should draw a tree so we can see what we're doing. Create a layer mask for the tree layer, lock the tree layer and then fill the mask with black. Next, draw a roughly circular shape with the maple leaf brush and make sure the middle is well filled in. That's our tree.

4.3 Depth and Shadow
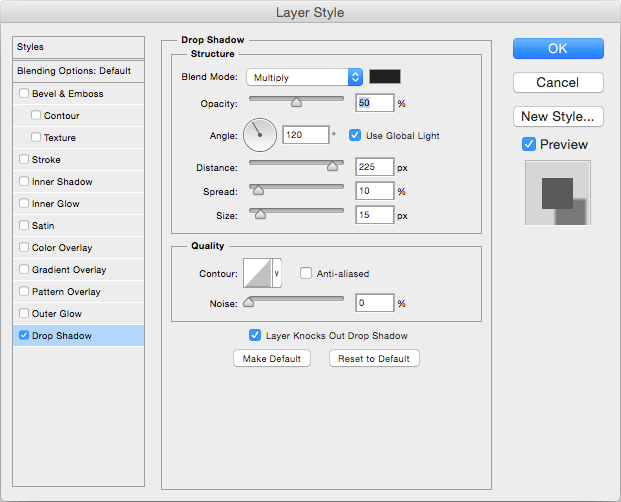
We can now give the tree a more three dimensional, realistic look with layer styles. First, the tree needs to cast a shadow. Give it a "drop shadow" layer style as follows.
Next, we can add some roundness to the treetop with an inner shadow.

Finally, I found that a black line around the outside helped pull the tree from the background.

The end result should be something like this.

4.4 Tree trunks
As it stands, the tree is a little misleading. What we're looking at is the foliage but what stops the players is the trunk. They can stand under the foliage.
This is easy to fix. Create a new layer called "Tree trunks". This layer has no tricks, no effects and no mask. You just use a hard edged round brush to put a black dot where the trunks of your trees are.

4.5 Drawing Trees
You have already seen the basics: draw the trees with the maple leaf brush and create a trunk with a black, round brush. However, when you do so, be mindful of the grid. Players will often take cover next to trunks or under trees so I generally try to make sure the trunk is centred in a square or on a vertex.
I also generally put the tree layer on top of the grid layer. It helps give the impression that they are taller than everything else on the map.
One side effect of this technique of creating trees is that they look odd if they touch. If you want very dense trees, you may want to create two or three tree layers and draw different trees on different layers so that they overlap. You can also use multiple tree layers to make trees with slightly different colouring. This looks especially good with autumn colours but even on maps with just green trees, a few different shades helps make the forest look more varied and realistic.
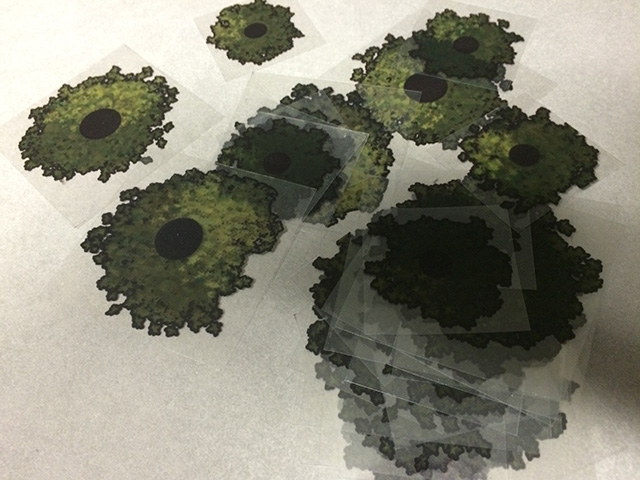
The final trick is not to put trees on your map at all. Instead, print them on overhead transparencies and cut them out. You can then scatter trees on a map any way you like, depending on circumstances. Make sure you have a good variety of sizes and colours.